 2:03 PM
 DaniaR

Menu dalam sebuah web dapat juga di buat melalui javascript dan css. yang akan anda lihat disini adalah cara membuat menu web sederhana menggunakan javascript dan css.
Berikut source
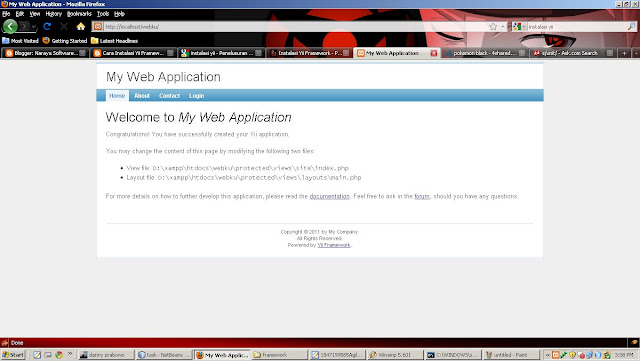
Yii ? sudah taukah kalian dengan framework itu ?. mungkin dari kalian ada yang sudah mengenalnya bahkan sudah memakainya. Saya pertama bingung dalam mencari framework yang mau saya pelajari. Iseng" cari di google dan akhirnya nemu framework ini. Di sini saya mau menjelaskan bagaimana cara installasi awal.
Ini adalah pengembangan dari komponen standart EXTJS. yaitu ComboBox TwinTrigger dengan combo kita akan membuat saat tombol combo di clik akan memunculkan grid di bawah combo tersebut.

Sekilas Info Mengenai CSS CSS (Cascading Style Sheet) merupakan bahasa pemrograman yang unik dan menarik untuk dipelajari. Arsitektur dari objek HTML, bisa juga berdiri sendiri sebagai pembangun sebuah halaman situs. Di dalam artikel ini, saya juga akan membahas beberapa standar baru untuk CSS3 yang akan segera menggantikan CSS2, dan mungkin akan membuat anda bereksplorasi lebih dalam lagi untuk membuat tampilan website lebih menarik lagi dan mulai meninggalkan website yang membuat anda stress dengan loading yang lama atau browser anda yang tidak cocok untuk website yang anda kunjungi.

Ketika kita berbicara tentang web design dan usability, maka kita tidak dapat melupakan sebuah perusahaan IT yaitu Apple. Produk-produk apple terkenal dengan design dan usability yang menawan. Ketika kita mengunjugi website apple kita akan melihat sebuah slide show yang terdiri atas dua bagian yaitu galery product dan thumbnailnya. Pada tutorial ini kita akan memadukan antara css dan jquery untuk membuat slideshow yang mirip seperti punyanya apple.

Setiap elemen HTML memiliki properti innerHTML yang mendefinisikan kedua kode HTML dan teks yang terjadi antara pembukaan elemen dan tag penutup. Dengan mengubah sebuah elemen innerHTML setelah beberapa interaksi pengguna, Anda dapat membuat halaman jauh lebih interaktif.
Namun, dengan menggunakan innerHTML memerlukan beberapa persiapan jika Anda ingin dapat menggunakannya dengan mudah dan terpercaya. Pertama, Anda harus memberikan elemen yang ingin Anda ubah sebuah id.Dengan id di tempat Anda akan dapat menggunakan fungsi getElementById, yang bekerja pada semua browser.
berikut contoh nya: Posted in: HTML
CREATE DATABASE IF NOT EXISTS `siswa` DEFAULT CHARACTER SET latin1 COLLATE latin1_swedish_ci;
USE `siswa`;

CREATE TABLE IF NOT EXISTS `asset` (
`id` int(11) NOT NULL auto_increment,
`no_absen` varchar(20) default NULL,
`name` varchar(100) default NULL,
`kelas` varchar(50) default NULL,
`Alamat` varchar(50) default NULL,
`description` text,
PRIMARY KEY  (`id`)
) ENGINE=InnoDB AUTO_INCREMENT=1640 DEFAULT CHARSET=latin1;
Setelah membuat database dan tabel maka masukanlah data sesuai yang anda inginkan, untuk demo export database.
function backup_tables($host,$user,$pass,$name,$tables = '*')
{

  $link = mysql_connect($host,$user,$pass);
  mysql_select_db($name,$link);

  //get all of the tables
  if($tables == '*')
  {
    $tables = array();
    $result = mysql_query('SHOW TABLES');
    while($row = mysql_fetch_row($result))
    {
      $tables[] = $row[0];
    }
  }
  else
  {
    $tables = is_array($tables) ? $tables : explode(',',$tables);
  }

  //cycle through


  foreach($tables as $table)
  {
    $result = mysql_query('SELECT * FROM '.$table);
    $num_fields = mysql_num_fields($result);

    $row2 = mysql_fetch_row(mysql_query('SHOW CREATE TABLE '.$table));
    //$return.= $row2[1].";\n\n";
    $return.= "\n\n".substr($row2[1],0,13).'IF NOT EXISTS'.substr($row2[1],12).";\n\n";

    for ($i = 0; $i < $num_fields; $i++)
    {
      while($row = mysql_fetch_row($result))
      {
        $return.= 'INSERT INTO '.$table.' VALUES(';
        for($j=0; $j<$num_fields; $j++)
        {
          $row[$j] = addslashes($row[$j]);
          //$row[$j] = ereg_replace("\n","\\n",$row[$j]);
          if (isset($row[$j])) { $return.= "'".$row[$j]."'" ; } else { $return.= "''"; }
          if ($j<($num_fields-1)) { $return.= ','; }
        }
        $return.= ");\n";
      }
    }
    $return.="\n\n\n\n";
  }
  $tanggal=date("d-F-Y");
  header("Content-Disposition: attachment; filename=backup_db_".$tanggal."_".time("G:i:s").".sql");
  header("Content-type: application/download");
  echo $return;
  exit;

}
Baiklah mungkin itu yang bisa saya berikan, semoga bisa membantu pembeljaran anda.
terima kasih. Posted in: PHP
Ketika kita berbicara tentang web design dan usability, maka kita tidak dapat melupakan sebuah perusahaan IT yaitu Apple. Produk-produk apple terkenal dengan design dan usability yang menawan. Ketika kita mengunjugi website apple kita akan melihat sebuah slide show yang terdiri atas dua bagian yaitu galery product dan thumbnailnya. Pada tutorial ini kita akan memadukan antara css dan jquery untuk membuat slideshow yang mirip seperti punyanya apple
DEMO : klik disini
Berikut ini adalah struktur Utama dari slideshow
Secara umum ada dua div utama yaitu Div dengan Id=”Menu” dan id=”slides”. Div menu berfungsi sebagai tempat thumbnail dari div Slides. Jadi jumlah image yang ada di slide harus sama dengan jumlah yang ada du thumbnail. Untuk menambah/mengganti slide cukup dengan menambah atau mengganti image silde dan thumbnailnya. untuk thumbnail anda harus menngunakan tipe PNG.
body,h1,h2,h3,p,quote,small,form,input,ul,li,ol,label{
 /* Page reset */
 margin:0px;
 padding:0px;
}

body{
 /* Setting default text color, background and a font stack */
 color:#444444;
 font-size:13px;
 background: #f2f2f2;
 font-family:Arial, Helvetica, sans-serif;
}

/* Gallery styles */

#gallery{
 /* CSS3 Box Shadow */
 -moz-box-shadow:0 0 3px #AAAAAA;
 -webkit-box-shadow:0 0 3px #AAAAAA;
 box-shadow:0 0 3px #AAAAAA;

 /* CSS3 Rounded Corners */

 -moz-border-radius-bottomleft:4px;
 -webkit-border-bottom-left-radius:4px;
 border-bottom-left-radius:4px;

 -moz-border-radius-bottomright:4px;
 -webkit-border-bottom-right-radius:4px;
 border-bottom-right-radius:4px;

 border:1px solid white;

 background:url(img/panel.jpg) repeat-x bottom center #ffffff;

 /* The width of the gallery */
 width:920px;
 overflow:hidden;
}

#slides{
 /* This is the slide area */
 height:400px;

 /* jQuery changes the width later on to the sum of the widths of all the slides. */
 width:920px;
 overflow:hidden;
}

.slide{
 float:left;
}

#menu{
 /* This is the container for the thumbnails */
 height:45px;
}

ul{
 margin:0px;
 padding:0px;
}

li{
 /* Every thumbnail is a li element */
 width:60px;
 display:inline-block;
 list-style:none;
 height:45px;
 overflow:hidden;
}

li.inact:hover{
 /* The inactive state, highlighted on mouse over */
 background:url(img/pic_bg.png) repeat;
}

li.act,li.act:hover{
 /* The active state of the thumb */
 background:url(img/active_bg.png) no-repeat;
}

li.act a{
 cursor:default;
}

.fbar{
 /* The left-most vertical bar, next to the first thumbnail */
 width:2px;
 background:url(img/divider.png) no-repeat right;
}

li a{
 display:block;
 background:url(img/divider.png) no-repeat right;
 height:35px;
 padding-top:10px;
}

a img{
 border:none;
}
$(document).ready(function(){
 var totWidth=0;
 var positions = new Array();
        //Lakukan luping di semua div image didalam div slide
 $('#slides .slide').each(function(i){
  positions[i]= totWidth;
  totWidth += $(this).width();

  if(!$(this).width())
  {
   alert("Please, fill in width & height for all your images!");
   return false;
  }
 });

 $('#slides').width(totWidth);

        //jika thumbnail di klik
 $('#menu ul li a').click(function(e){

  $('li.menuItem').removeClass('act').addClass('inact');
  $(this).parent().addClass('act');

  var pos = $(this).parent().prevAll('.menuItem').length;
  $('#slides').stop().animate({marginLeft:-positions[pos]+'px'},450);

  e.preventDefault();
 });

 $('#menu ul li.menuItem:first').addClass('act').siblings().addClass('inact');
});
Kode ini sangat simple, kita akan memanfaatkan fungsi animasi dari jquery untuk mempermudah proses slideshow.
Dimodifikasi dari http://tutorialzine.com/2009/11/beautiful-apple-gallery-slideshow/ Posted in: CSS
SELECT (date(sysdate())-date(waktu)) AS selisih FROM trxberjalan dengan hasil yg sesuai harapan pada MySQL Windows, namun tidak bisa dijalankan di MySQL pada sistem operasi GNU/Linux.
SELECT DATEDIFF(SYSDATE(),waktu) AS selisih FROM trx
Posted in: mysql
Posted in: PHP
Posted in: blogger


